|
|
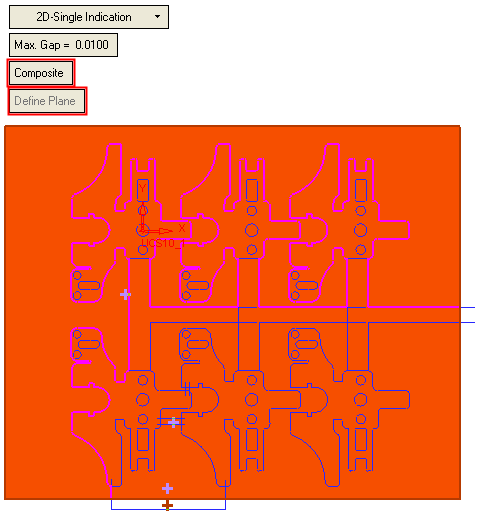
Composite Curve  : Options & Results - 2D Single Indication
![]()
![]()

Access: Open this function from one of the following locations:
-
Click
in the toolbar. -
Select Wireframe > Main Tools > Composite Curve from the menu bar.
-
Select Composite Curve on the popup menu if no geometry is selected or if one or faces are selected.
Create a contour from a series of curves/edges.
Create a contour by using a single indication (close to screen or close to face). The system finds a closed loop from all displayed edges/curves lying in the defined plane (up to the defined tolerance).
Use the Composite Curve > 2D Single Indication option to define a closed and planar composite curve by using a single indication (close to screen or close to face). The system finds a closed loop from all displayed edges/curves lying in the defined plane (up to tolerance). This option is mostly used in the DieDesign application to create a closed contour in order to define a punch.
Note: The Composite Curve > 2D Single Indication option is used by the DieDesign function Punch/Trim Curve. For specific information regarding the differences between these two functions, see Punch/Trim Curve.
Options
The Composite Curve > 2D Single Indication function includes the following options.
-
XY Active: In this case, pick points on the default XY Active plane. The system then searches for all the edges/curves on this plane only and creates a composite.
-
Define Plane: In this case, pick a planar face. The system then creates a composite from all the edges/curves on this planar face.
The pictures below show how adding picking points in different locations generates different results.
-
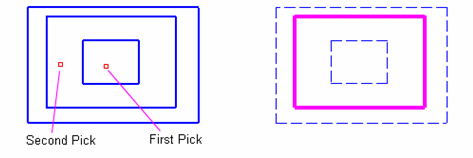
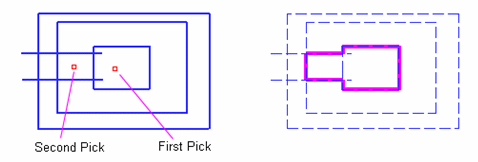
In the following cases, the boundaries of two picks have at least one common edge, resulting in an outer contour.
-
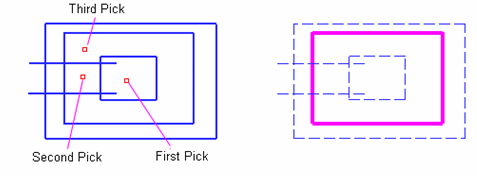
In these more complex cases, the boundaries of three picks have at least one common edge, resulting in outer contours.
-
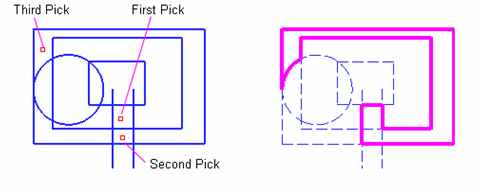
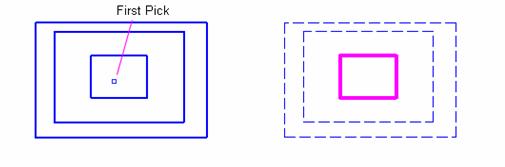
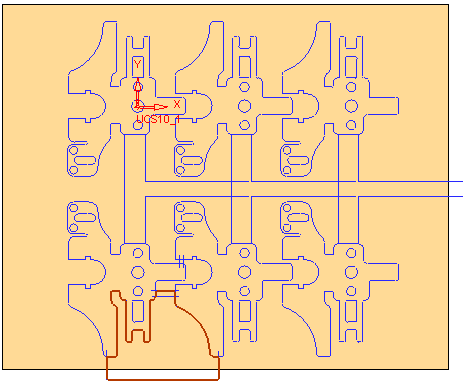
In this example, the system creates a closed contour from the first pick.
XY Active
Required Step 1 
-
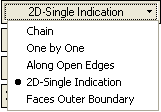
Choose the 2D-Single Indication option.
-
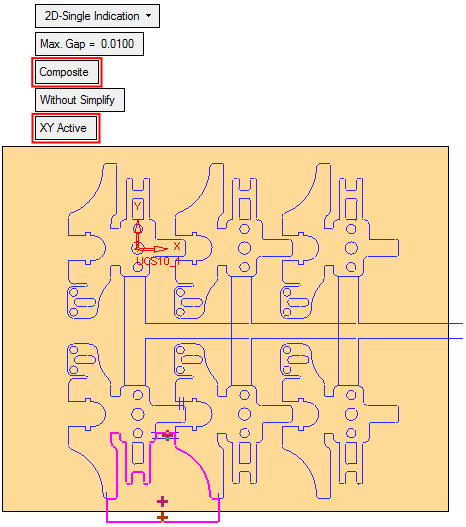
Ensure the Composite and XY Active toggle buttons are selected. Pick the points for the composite curve on the default XY Active plane.
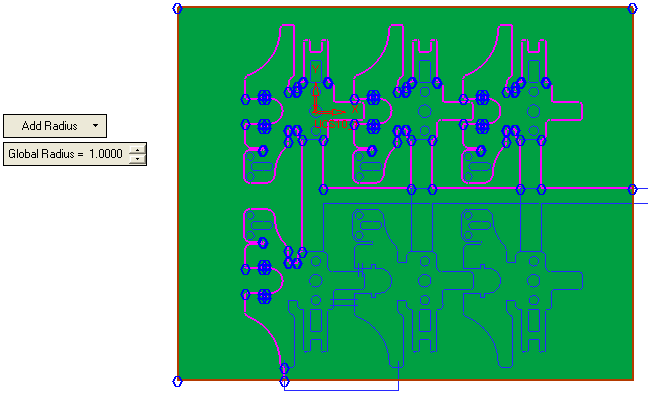
Optional Step 1 
-
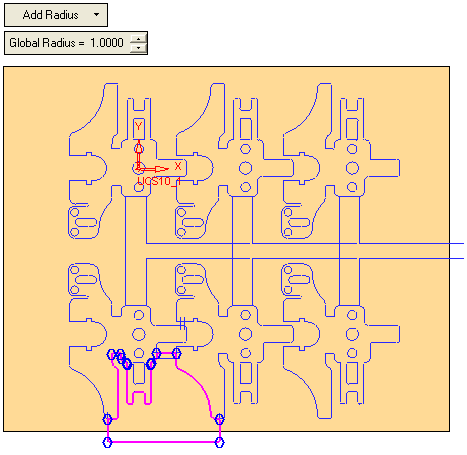
If required, use the Optional Step to add or remove radii at the corners of the composite curve.
-
Click OKOK
 or ApplyApply
 in the Feature Guide to complete the function. The result is displayed in the following image.
Define Plane
Required Step 1
-
Choose the 2D-Single Indication option.
-
Ensure the Composite and Define Plane toggle buttons are selected. Select the plane for the composite curve.
Optional Step 1
-
If required, use the Optional Step to add or remove radii at the corners of the composite curve.
-
Press OK
or Apply  in the Feature Guide to complete the function. The result is displayed.
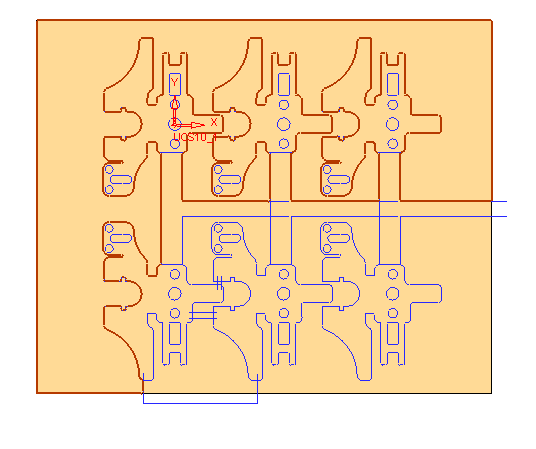
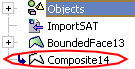
When complete, the Composite feature will appear in the Feature Tree.

|