|
|
Replace Faces 


Access: Open this function from one of the following locations:
-
Select Tools > ECO Tools > Replace Faces from the menu bar.
-
Right-click the All ECO root folder in the ECO Tree and select Replace Faces.
-
Right-click the relevant ECO# folder in the ECO Tree and select Replace Faces.
-
Right-click the relevant comparison folder (in the ECO# folder) in the ECO Tree and select Replace Faces.
-
Right-click the relevant part in the comparison folder in the ECO Tree and select Replace Faces.
Replace faces in the work part with faces of an ECO part to apply an ECO change.
This function replaces faces in one part of the assembly with other part faces (deleting faces from the first part and "importing" faces from the second part).
In a typical system development cycle, the specification or the implementation is likely to change during engineering development or during integration of the system elements. These last-minute design changes are commonly referred to as Engineering Change Orders (ECOs) and affect the functionality of a design after it has been wholly or partially completed.
In general, it is recommended to use the Replace Master Part function at the beginning of the project and the Replace Faces function (which is at the end of the history) at a very advanced project, where the original connection to the master is not so relevant.
General Interaction
The following is the Feature Guide for Replace Faces.
|
|
|
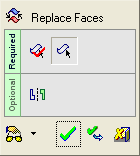
Required Step 1 ![]() : Pick the faces to be removed.
: Pick the faces to be removed.
Required Step 2 ![]() : Pick the faces to be added.
: Pick the faces to be added.
Optional Step 1 ![]() : Multiple core/cavity options.
: Multiple core/cavity options.
Detailed Interaction
See Options and Results.
|