|
|
Helix  : Options and Results


Access: Open this function from the following location:
-
Select Wireframe > Create Curves > Helix from the menu bar.
Create a helix curve.
Required Step 1 
-
Depending on the type of helix selected, helix or spiral, the following parameters are displayed.
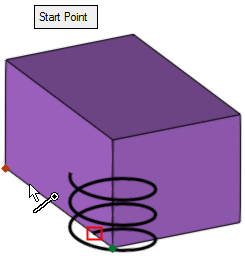
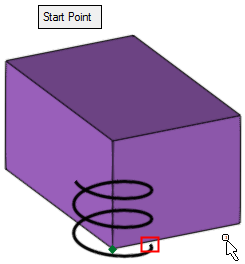
Pick the helix start point, set the helix parameters, and define the direction.
Parameters
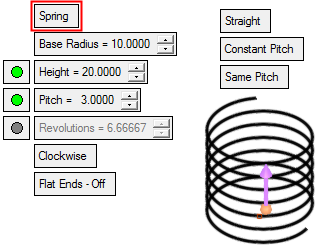
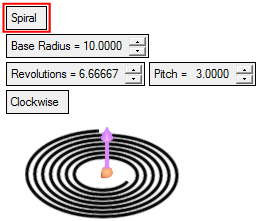
Spring /
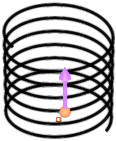
SpiralThis toggle option enables you to define a helix with height or a flat spiral.
ExampleExampleSpring
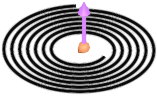
Helix with heightSpiral
Flat spiral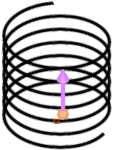
Base Radius
The radius at the start point of the helix.
Height /
Pitch /
RevolutionsFor Springs, all three parameters are displayed.
For flat Spirals, the Height parameter is not displayed.
Height
The total height of the helix.
Pitch
For Springs: The distance from one point on the helix to a corresponding point on the next complete helix turn, measured parallel to the axis of the helix.
ExampleExample
For Spirals: The radial distance between revolutions of the curve.
Revolutions
The number of turns.
Click here to expand parameter explanation.Click here to expand parameter explanation.
For Springs:
In this group of parameters, an active parameter (available for editing) is signified by an adjacent green button. A grayed-out parameter (together with its adjacent gray button) is unavailable for editing, as its value is derived from the values of other parameters.
In this case, the grayed-out parameter value is derived from the values of the other two parameters in the parameter group.
To make a grayed-out parameter active (available for editing), press a green button in the parameter group. The selected button turns gray, its adjacent parameter becomes grayed-out (parameter unavailable), and the previously grayed-out button becomes green (parameter available).
Clockwise /
Counter-ClockwiseThis toggle option defines the 'twist' direction of the helix.
ExampleExampleClockwise Helix
Counter-Clockwise Helix
Flat Ends - Off /
Flat Ends - OnThis toggle option defines the ends of the spring – flat or not.
If Flat Ends - On is selected, this adds a flat portion to the ends of the spring at a specified angle (up to 360°). To set the angle, an Angle parameter is displayed with a default value of 180°.
ExampleExampleFlat Ends-OFF
Flat Ends-ON:
180°Flat Ends-ON:
180°Flat Ends-ON:
360°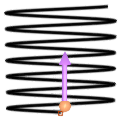

Straight /
TaperThis toggle option defines whether or not the spring is tapered.
ExampleExample
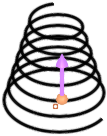
Straight
The radius of the spring is constant from the Base Radius.
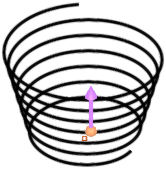
Taper
The radius of the spring is tapered from the Base Radius.
Click here to expand parameter explanation.Click here to expand parameter explanation.
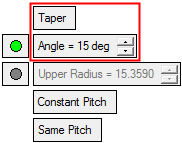
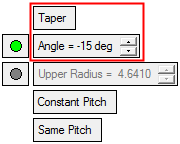
If Taper is selected, the following parameters are displayed:
Angle
Angle from the Base Radius.
The default = 1. Positive or negative values may be given.Notes:
-
If a negative angle is defined such that the set Height cannot be achieved, a message is displayed and the angle value is adjusted such that the Upper Radius value > 0.
-
If a negative angle is defined and other parameters are changed (Height/Pitch/Revolutions) such that the Upper Radius value would be ≤ 0, a message is displayed and the angle value is adjusted such that the Upper Radius value > 0.
Upper Radius
The radius of the spring at the end point.
In this group of parameters, an active parameter (available for editing) is signified by an adjacent green button. A grayed-out parameter (together with its adjacent gray button) is unavailable for editing, as its value is derived from the values of other parameters.
In this case, the grayed-out parameter value is derived from the active value in the parameter group with respect to the Height value.
To make a grayed-out parameter active (available for editing), press a green button in the parameter group. The selected button turns gray, its adjacent parameter becomes grayed-out (parameter unavailable), and the previously grayed-out button becomes green (parameter available).
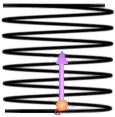
Constant Pitch /
Variable PitchThis toggle option defines the pitch status at the top of the spring.
ExampleExampleConstant Pitch
Default parameters = Constant Pitch
Different parameter settings
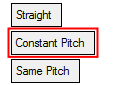
Constant Pitch
The pitch of the spring is constant from bottom to top, as defined by the Pitch parameter.
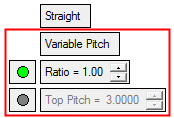
Variable Pitch
The pitch of the spring varies from bottom to top, as defined by the parameters below.
Click here to expand parameter explanation.Click here to expand parameter explanation.
If Variable Pitch is selected, the following parameters are displayed:
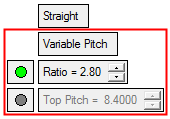
Ratio
The ratio between the bottom pitch value (Pitch parameter) and the Top Pitch value.
The default = 1, (Top Pitch = Pitch [bottom pitch]).
Positive values only.For example:
- If Ratio = 1, this basically means constant pitch
(Top Pitch = Pitch) - If Ratio = 10, this means that the Top Pitch = Pitch x 10
- If Ratio = 0.05, this means that the Top Pitch = Pitch x 0.05.
Top Pitch
The pitch at the top of the spring.
In this group of parameters, an active parameter (available for editing) is signified by an adjacent green button. A grayed-out parameter (together with its adjacent gray button) is unavailable for editing, as its value is derived from the values of other parameters.
In this case, the grayed-out parameter value is derived from the active value in the parameter group with respect to the Pitch and Revolutions values.
To make a grayed-out parameter active (available for editing), press a green button in the parameter group. The selected button turns gray, its adjacent parameter becomes grayed-out (parameter unavailable), and the previously grayed-out button becomes green (parameter available).
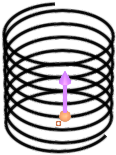
Same Pitch /
Different Pitch at EndsThis toggle option defines the pitch status at the ends of the spring.
ExampleExampleSame Pitch

Default parameters = Same Pitch
Different parameter settings
This option is only available if the following options are selected:
- Constant Pitch
- (Height and Pitch) or (Revolutions and Pitch)
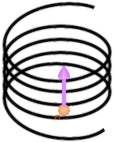
Same Pitch
The pitch of the spring is constant, as defined by the Pitch parameter.
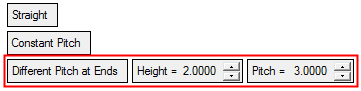
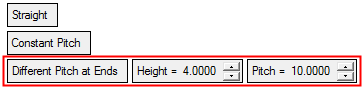
Different Pitch at Ends
The pitch at the ends of the spring differ from that defined by the Pitch parameter.
Click here to expand parameter explanation.Click here to expand parameter explanation.
If Different Pitch at Ends is selected, the following parameters are displayed:
Height
The height at the ends of the spring within the region where the pitch value (set below in this group of parameters) differs from the 'main' pitch value.
This parameter is displayed if the Height and Pitch options are selected. The default = Height: base Height/10.
Notes:
-
The above Height value must be smaller than the base Height/2.
-
If the base Height is reduced, then the above Height value is set to the default.
Revolutions
The number of revolutions at the ends of the spring within the region where the pitch value (set below in this group of parameters) differs from the 'main' pitch value.
This parameter is displayed if the Revolutions and Pitch options are selected. The default = Revolution: base Revolution/10.
Pitch
The pitch at the ends of the spring. The default = Pitch: base Pitch.
-
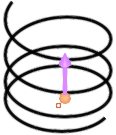
Optional Step 1
-
Pick a point to define the helix start angle. The helix start is set by the angle defined by the picked point with the start point selected in step 1.
Example start angle of the helix Picked point Picked point 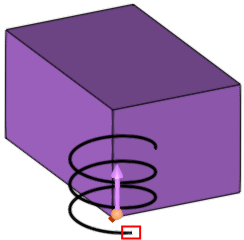
-
Click <exit><exit> when finished. Click OKOK
 or ApplyApply
 in the Feature Guide to complete the function.
When completed, the Helix feature will appear in the Feature Tree.

|