|
|
Automated Drill: Auto Fit Sequence 
Access: Open this function from one of the following locations:
Select an Automated Drill procedure (from the Process Manager) and choose one of the following:
-
Select Auto Fit Sequence from the Automated Drill Guide.
-
Select NC Utilities > Automated Drill > Auto Fit Sequence from the menu bar.
-
Right-click the Unassigned Group branch in the Group and Sequence Manager and select Auto Fit Sequence from the popup menu.
-
Right-click the appropriate Group under the Unassigned Group branch in the Group and Sequence Manager and select Auto Fit Sequence from the popup menu.
Search for predefined matching Hole Sequences for unassigned groups.
A Hole Sequence is a set of faces describing a hole.
This function enable you to search for a sequence and attach it to the selected group. The system stores as default the values that were used last.
The following default parameters are displayed:

Parameters
|
All Unassigned Groups / Single Group |
This is a toggle option:
The usual selection options are available. To avoid inadvertently selecting holes already belonging to groups, make sure that the appropriate groups hide/show buttons are off in the Group and Sequence Manager. Notes:
|
||||||||||
|
Auto Fit Options |
See Auto Fit Sequence Options for a description of these options. |
When finished, press one of the following approval options (these options are initially grayed out):
|
OK: Accept the changes, perform the operation and close the current dialog/task. |
|
Apply: Accept the changes, perform the operation and keep the current dialog/task open. |
|
Cancel: Cancel all changes and close the current dialog/task without saving the settings. |
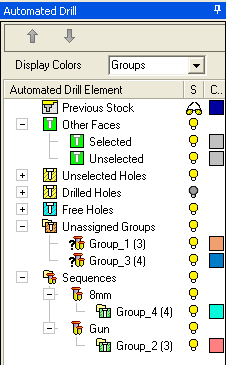
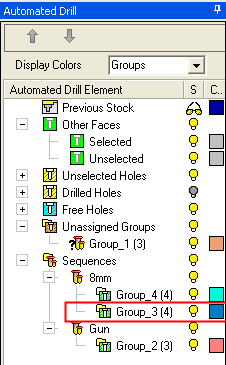
If OK. is pressed, the result is shown in the Group and Sequence Manager; in the example below, the selected group is assigned a drill sequence.
|
Before the Auto Fit Sequence |
After the Auto Fit Sequence |
|
|
|
Note:
-
When an Automated Drill procedure is divided by a Cutter Change, the comment of the created procedure contains the sequence name.
The <Sequence Name> is defined as follows: If all motions in the created procedure belong to a single sequence, then it is the name of that sequence, otherwise the name is Multi Sequence.
The format of the comment is as follows: <Sequence Name> N of M <old procedure's comment>.
For example:
Single sequence: Through 16 H=27 9 of 14 No Text
Multi sequence: Multi Sequence 7 of 14 No Text
|


