|
|
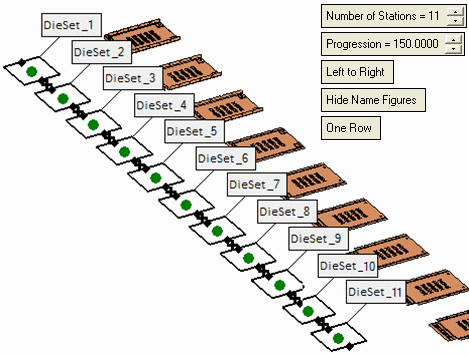
Define Die Set & Station Settings  : Options and Results


Access: Open this function from one of the following locations:
-
Select Die Design > Transfer Die Sets > Define Die Sets & Stations from the menu bar
-
Select Transfer Die Sets > Define Die Sets & Stations from the following Die Design Guide: Die Tool Design Guide (Transfer).
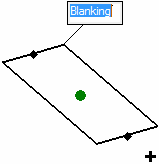
Create the appropriate sub-assemblies under the Tool Design assembly and create a suitable array for the placement of forming shapes.
This function is used in Transfer Die. Die set and station definitions can be edited by selecting Edit Die Set / Station Settings.
Required Step 1 
-
Set the parameters and/or drag the boxes to define the die sets.
In general, you need to set the number of stations, the general progression value, the number of rows (one or two) and direction, Left to Right or Right to Left. In addition, you can set an individual progression and define the die set arrangement by dragging the box figures and setting appropriate names (this determines which stations are included in which die set).
The following screen parameters and icons are displayed:
The following icons represent different elements in this function:
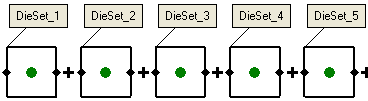
Represents the stations.

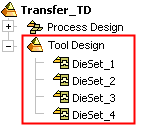
Represents the die sets. Each die set is a sub-assembly under the Tool Design assembly. See below for additional information.
-
Set the parameters as required:
Number of Stations
Set the number of stations. The default number of stations is derived from the process design, however, you can add or delete stations as required.
Progression
Set the Progression value. The initial value is as set in the process design, however, you can change this as required.
In addition, you can also set a local progression value that is different from the general value.
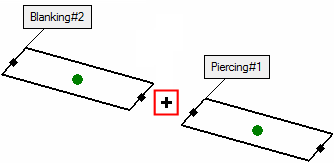
To set a local progression value:To set a local progression value:-
Select the
 figure that is displayed between two adjacent die sets, for example:
-
A label is displayed with the current progression value. Set the required local value, for example:
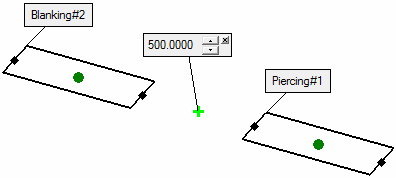
To delete a local progression value, click the
 button at the top right hand corner of the appropriate label.
Left to Right
Define the direction of the die sets. This is a toggle button: Left to Right or Right to Left.
Hide Name Figures
This toggle button hides or shows the die set figures (labels).
One Row
This toggle button enables you to define one or two rows of stations (represented, as mentioned above, by
). Two rows are used to support die sets designed for tooling mirrored parts.One Row
One row of stations is displayed per die set.
For example:For example: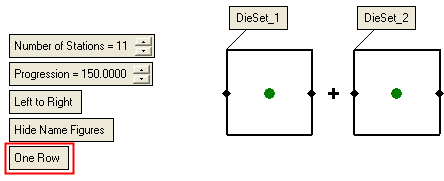
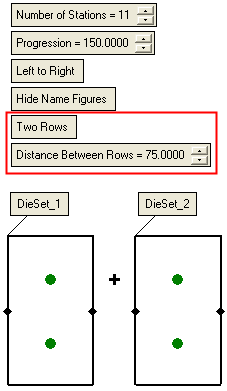
Two Rows
Two rows of stations are displayed per die set. An additional parameter is displayed, Distance Between Rows. This parameter controls the distance between the rows within the die set.
For example:For example:Two Rows:
Distance Between Rows = 150Two Rows:
Distance Between Rows = 75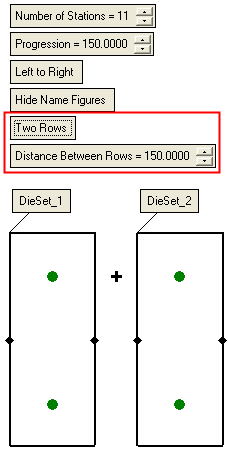
-
- When finished, click OK
 or Apply
  in the Feature Guide to complete the function.
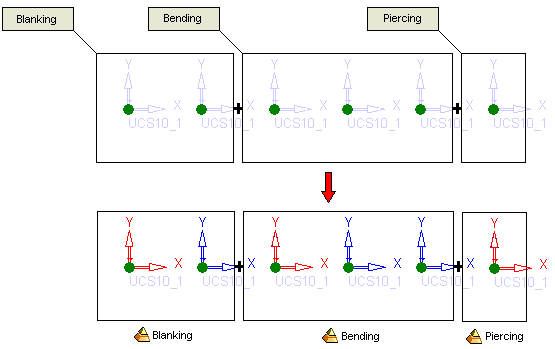
Each die set is represented as a sub-assembly under the Tool Design assembly.
A UCS is created at each station. These UCSs are used later on to add forming shapes to the die sets. All sub-assemblies (die sets) have their main UCS at the left-most station (if Left to Right is defined) or right-most station (if Right to Left is defined).
Additional operations
Die Set Figures
A figure (label) is attached to each die set. This figure can be shown or hidden by toggling the Show/Hide Name Figures button in the screen parameters (see below).
Initially, the figures display "DieSet_<n>" where n is the die set number. However, you can rename these figures as required, for example:
Die Sets with more than one station
To include more than one station in the same die set:
-
Drag the required die set box over the next station (as shown).
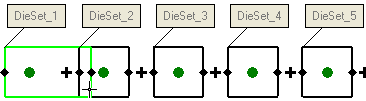
This informs the system that both stations are included in the same die set.
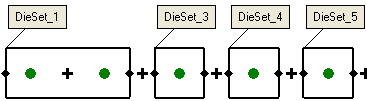
Note that the die set that was included in the preceding die set, in this case DieSet_2, was deleted.
If you subsequently drag the die set back past the mid point between the stations (the point), the dragged box does not encompass the neighboring station.
A new die set (sub-assembly) is created around any station that does not have a die set associated with it.
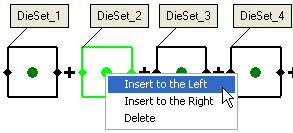
Station Figure Operations
Additional options are available by right-clicking on a station figure. These options are especially useful in Edit mode if extra forming shapes are added later.
|
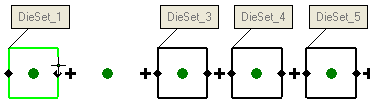
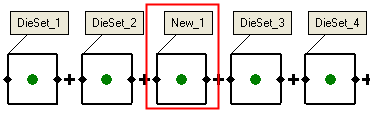
Insert to the Left |
Inserts a new die set to the left of the currently highlighted die set.
The result is
|
|
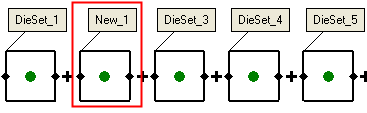
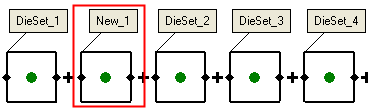
Insert to the Right |
Inserts a new die set to the right of the currently highlighted die set.
The result is
|
|
Delete |
Deletes the currently highlighted die set. |

|