|
|
Automated Drill: Group Manager 

Access: Open this function from one of the following locations:
Select an Automated Drill procedure (from the Process Manager) and choose one of the following:
-
Select Group Manager from the Automated Drill Guide.
-
Select NC Utilities > Automated Drill > Group Manager from the menu bar.
-
Right-click the appropriate Unassigned Group in the Group and Sequence Manager and select Group Manager from the popup menu.
Group holes and drill points.
This function enables you to do one of the following:
-
Pick holes and select similar holes and automatically attach them to groups or detach them from groups.
-
Pick points and manually attach them to groups. This enables you to attach drill points (where no hole currently exists) to unassigned groups or to sequences.
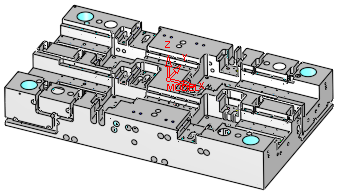
When the Automated Drill procedure is activated, the entire model is scanned for holes regardless of whether the holes are displayed or not. However, only the holes relevant to the current procedure are available for selection. This is dependent upon the type of drill procedure (3, 4, or 5-axis) and the Z direction of the active UCS. In addition, the limiting factor for 3X is Enlarging Holes and for 5X is the Max. Inclination Angle.
|
In this example, for Automated Drill 3X, note the active UCS and the displayed holes. |
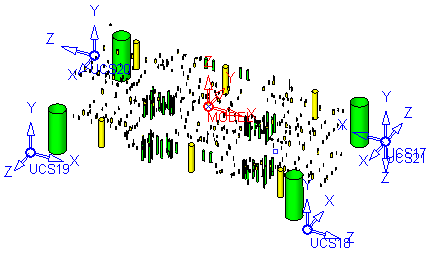
In this example, for Automated Drill 5X, note the active UCS and the displayed holes. |
|
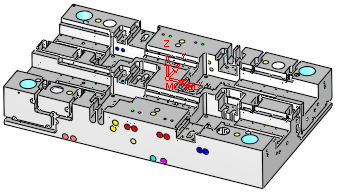
The same part with the Other Faces hiddenhidden. Note that all the scanned holes are displayed.
|
The same part with the Other Faces hiddenhidden. Note that all the scanned holes are displayed.
|
The following default parameters are displayed:
|
|
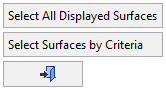
If no part surfaces have been selected, the surface selection options are displayed:
|
Parameters
|
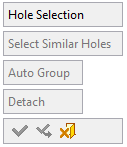
This is a toggle option:
The usual selection options are available as well as Select Similar Holes (below). When using Select by Box or Select All, the system only selects legal holes). To avoid inadvertently selecting holes already belonging to groups, make sure that the appropriate groups hide/show buttons are off in the Group and Sequence Manager. Notes:
|
||||||||||||||||||||
|
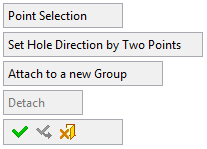
Set Hole Direction by Two Points |
This option is displayed when Point Selection is used and enables you to define the drilling direction by picking 2 points. This defines the direction for all selected points. This option only appears in 4/5X procedures. |
|||||||||||||||||||
|
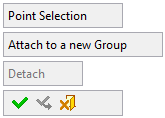
Attach to a new Group |
Create a new group and attach the picked points to the group. Displayed when Point Selection is used. |
|||||||||||||||||||
|
Select Similar Holes |
Select all visible legal similar holes. Displayed when Hole Selection is used. This geometric matching includes identical geometry and identical hole attributes (threads, etc.). |
|||||||||||||||||||
|
Auto Group |
Attach the picked holes to an appropriate group. If such a group does not exist, it is created. A group has a geometry that is defined by the first attached hole. |
|||||||||||||||||||
|
Detach |
Detach the picked hole(s) from its group. The detached hole(s) "rejoin" the relevant Free Hole group. |
|||||||||||||||||||
Define the method to be used for selecting holes, Hole Selection or Point Selection.
When finished, press one of the following approval options (these options are initially grayed out):
|
OK: Accept the changes, perform the operation and close the current dialog/task. |
|
Apply: Accept the changes, perform the operation and keep the current dialog/task open. |
|
Cancel: Cancel all changes and close the current dialog/task without saving the settings. |
|