|
|
Create Report Image 


Access: Open this function from one of the following locations:
-
Select Electrode > Tools > Report Image from the menu bar.
-
Right-click the Component
 , Electrode
  or Location
  in the Electrode Tree to display the popup menu and then select Report Image > Create Image.
Define images for the NC Report.
Create an image in the Electrode Assembly environment, for the NC Report. The image includes a description of the electrode dimensions as well as the electrode location within the assembly. The image contents can be controlled by defining templates.
The image is saved together with the part file and then integrated into the Electrode NC Report.
When creating an Electrode NC Report, the image used in the report can either be generated by the Create Report Image function (in the Electrode environment) or by the NC Report function (in the NC environment). By default, the system uses the image created by the Create Report Image function; however, if no image was created using this function, the system then uses the image generated by the NC Report function.
|
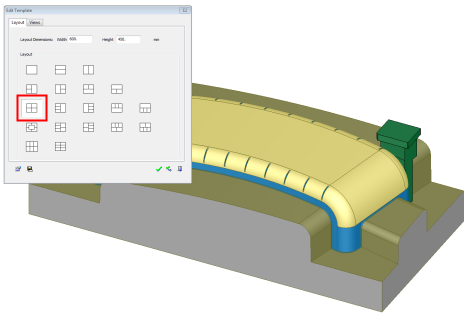
The example below shows the Edit Template dialog (see below) where you can define the views that will be included in the NC Report. In this case, a report with four views was selected. |
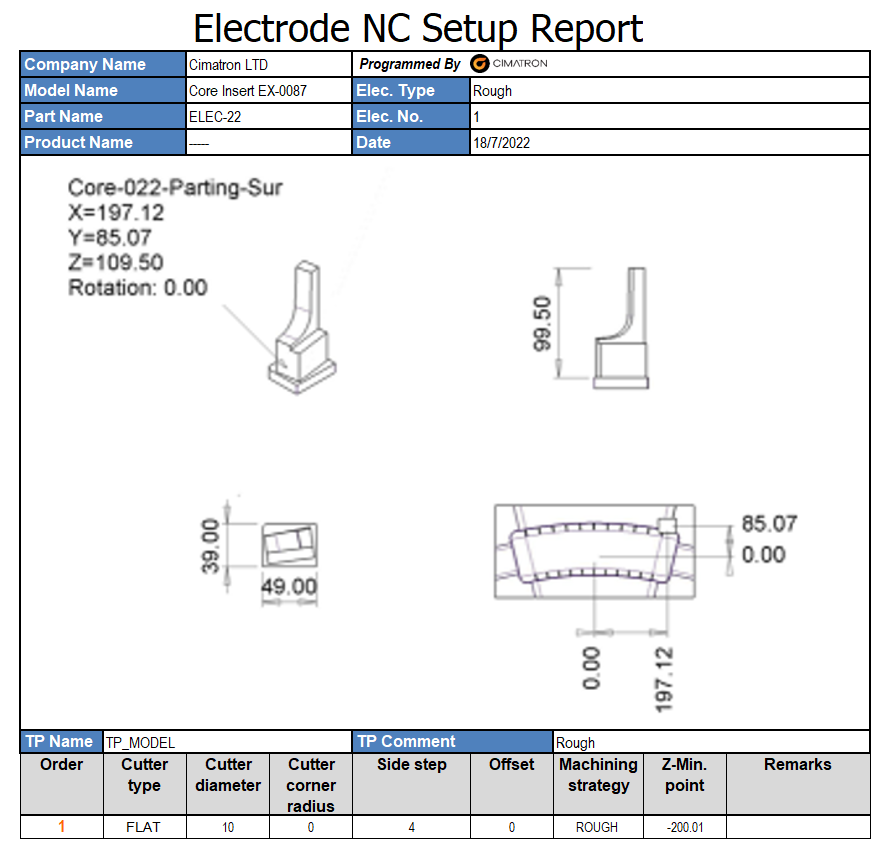
The report shows the views that were created automatically. Three views are of the electrode (including its dimensions and burning location), and the fourth view (bottom right) shows the part itself with the electrode as a top view |
|
|
|
General Interaction
The following is the Feature Guide for Create Report Image .
|
|
|
Required Step 1  : Pick the electrodes to be included in the image.
Required Step 2 ![]() : Select or edit a template to define the image layout.
: Select or edit a template to define the image layout.
Detailed Interaction
See Options and Results.
|