|
|
Creating a Parallel Line

Access: Invoke the Sketcher, define the sketch plane and then invoke this function from one of the following locations:
-
Click the Line button
 in the Sketcher toolbar.
 -
Right-click the graphics area and select Line from the popup menu.
Create a line.
The procedure below describes how to create a line that is parallel to an existing line. The new line and the existing line are mutually constrained. The new line can also be constrained by additional entities in the graphics display area.
|
Demo: Press the button below to view a short movie demonstrating the function: |
|
|


Note: If the existing line is not in the current sketch, you must add it to the sketch as a reference entity.
Create a line parallel to an existing line
-
Select the Line tool
.
The cursor appears in the graphical display area as a crosshair-and-line  .
.
-
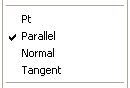
Right-click to display the popup submenu and select the Parallel option.
-
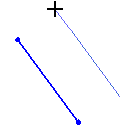
Click on an existing line and move the cursor away from it.
Note: Instead of using the popup submenu, you can click the entity when the parallel constraint is activated - a dashed cyan line. See Alignment with Existing Entities.
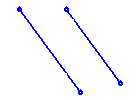
The new line is constrained and stays parallel the line that was picked.
-
You can define an additional constraint for the new line.
-
Click to define the position for the start point.
-
Move the cursor and change the length or direction of the new line.
-
Click to define the end point.
Note: Dynamic constraint lines can help you position the new line relative to the XY axis or other entities.
Note: After a parallel line has been placed, the line default option (Pt) is automatically selected again in the popup submenu, ready to create continuous lines from points. If you want to create more parallel lines, you must select the Parallel option again.
If you do not want the lines to be continuous, press the middle mouse button to disconnect them.
|