|
|
Add Comparison Part  : Options and Results
Access: Open this function from one of the following locations:
Add or import a part containing an ECO.
This function brings in the ECO part (the part containing the ECO that is received from the customer) and enables you to perform comparisons. In addition, this function enables you to create a new ECO folder in the ECO Tree if you haven't already done so.
In a typical system development cycle, the specification or the implementation is likely to change during engineering development or during integration of the system elements. These last-minute design changes are commonly referred to as Engineering Change Orders (ECOs) and affect the functionality of a design after it has been wholly or partially completed.
Note: Default ECO comparison colors are defined in the Preferences. The colors set in the Preferences are given to any new comparison. Changes in the ECO dialog do not affect the Preferences.
Required Step 1 
The Cimatron Explorer is displayed. Pick the ECO part received from the customer.
Required Step 2 
Pick the reference part; the part with which the ECO part will be compared. This is usually the previous ECO part or the master part.
The following parameters are initially displayed:
|
|
|
|
|
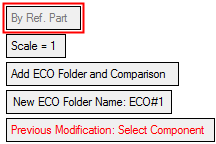
By Ref. Part |
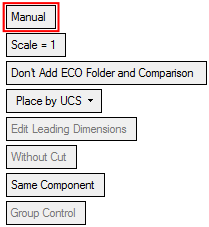
This is a toggle option that enables you to choose how to position the ECO part. This toggle option in only available when the option Don't Add ECO Folder and Comparison is selected - see below.
|
||||||||||||||
|
Scale |
The scale that is used when adding the reference part. This can either be generated automatically by the system or manually entered. When generated automatically (using the By Ref. Part option above), this is taken either from a scale feature in the reference part (if one exists) or from the Shrinkage Factor in the Mold Layout tab of the Setup dialog. When the Manual option is selected above and the ECO part is positioned manually, you must know the scale used in the mold before positioning the part. The default value is 1. This parameter is not displayed in the DieDesign environment; see the Use Original Part parameter below. |
||||||||||||||
|
Use Original Part |
This toggle option Use Original Part / Create Import Copy Part is only displayed in the DieDesign environment.
|
||||||||||||||
|
Add ECO Folder and Comparison |
This is a toggle option Add ECO Folder and Comparison / Don't Add ECO Folder and Comparison, that enables you to decide whether or not to add an ECO folder (for the new ECO part) and to create an automatic comparison between the added (ECO) part and the previous part or master part.
|
Optional Step 1 
Set the offset and rotation parameters.
Optional Step 2 
Pick a UCS to position the component
Press OK ![]() or Apply
or Apply ![]() in the Feature Guide to complete the function.
in the Feature Guide to complete the function.
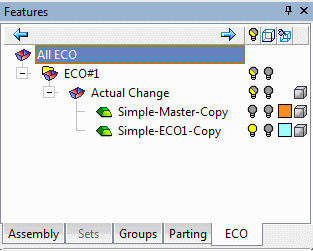
If the Add ECO Folder and Comparison option was selected above, an ECO folder is added and a comparison is created between the added (ECO) part and the previous (or master) part. This comparison is created under a folder called Actual Change (under the relevant ECO folder). See the example below.
|
|
In this example, the following were created:
|
Note: If the system finds that there is a previous ECO part but it is located in a different location, the parameter Previous Modification: Select Component is not filled automatically and remains displayed in red. The reason for this is that since the parts are in different locations the Actual Change folder does not find any similar faces.
|


