|
|
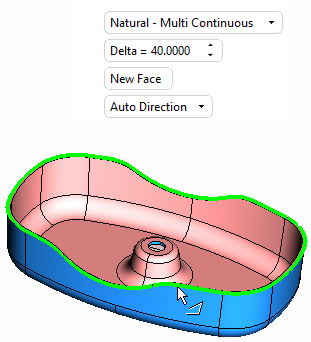
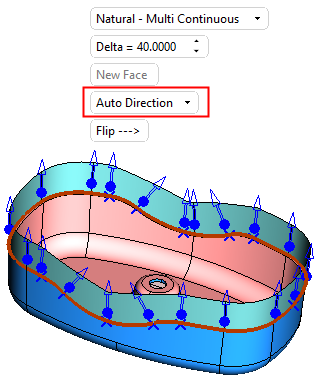
Extend (Face)  : Natural - Multi Continuous


Access: Open this function from one of the following locations:
-
Click the
button
in the toolbar. -
Select Faces > Main Tools > Extend from the menu bar.
-
Select Parting Surfaces > Extend New Parting from the Mold Design Guide Toolbar or Parting Guide Toolbar.
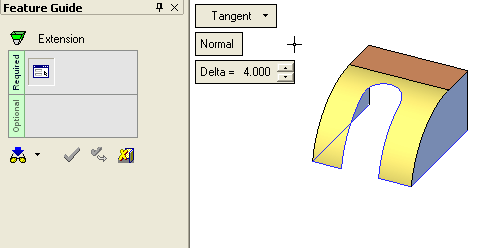
Extend faces beyond their edges. This extends one or more faces (or creates new faces) on the edges of open or stitched faces.
In the Natural - Multi Continuous option, create a multiple natural extension on a continuous sequence of edges (composite) of one or more faces. In this option the extensions may either be new or same faces; see the New Face parameter explanation below.
|
Demo: Press the button below to view
a short movie demonstrating the function:
|
Practice: Press the button below to open Cimatron with a practice ELT file similar to that used to create the movie (if the relevant feature already exists in the ELT file, you can either edit it or delete it and create a new feature). |
|
|
|

Required Step 1 
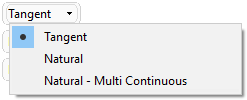
Select Natural - Multi Continuous from the dropdown list of Extend function options:
For the face(s) to be extended, pick one or more edges or a composite curve based on the edges of open or stitched faces and set the parameters.
|
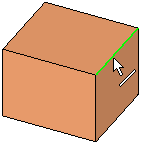
In the example below a composite curve is picked. |
Once the edge(s) or composite curve is selected, additional parameters are displayed. |
|
|
|
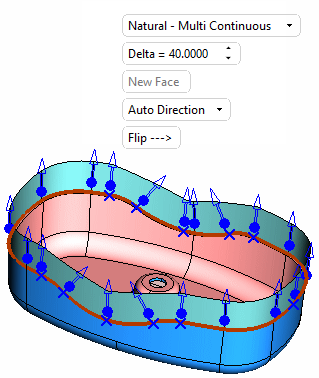
Set the parameters as required:
|
Delta |
The length of the extension. |
||||||
|
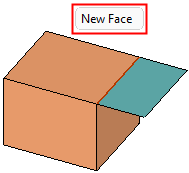
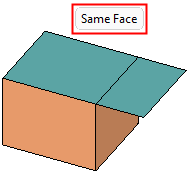
New Face |
This is a toggle option New Face / Same Face that enables you to define the extension either as a new face or as part of the same face whose edge was selected. The following conditions apply to this parameter:
|
||||||
|
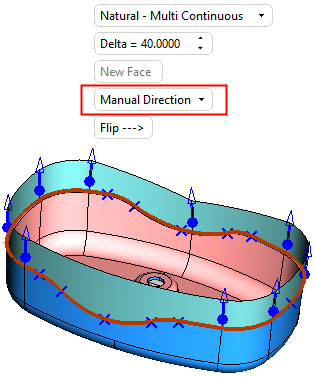
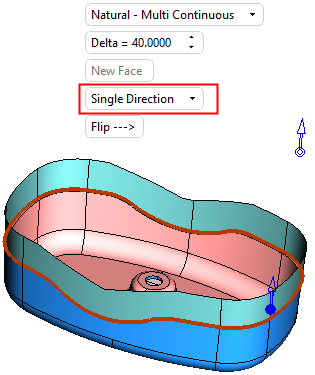
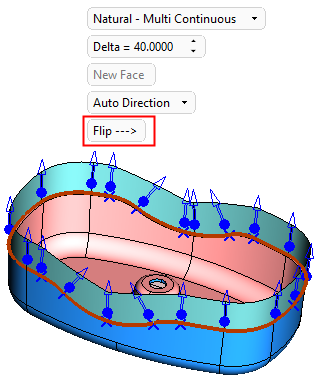
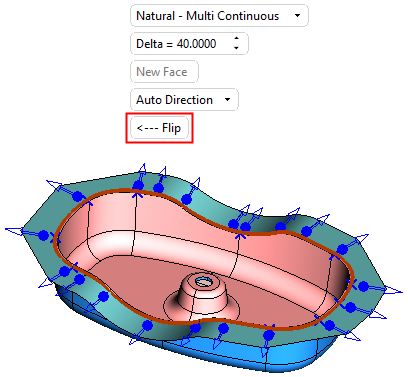
Auto Direction |
This is a dropdown list of options that enables you to define how to control the directions of the extension. The following options are available:
|
||||||
|
Flip |
Flip the direction of the extension. The system flips the direction by automatically choosing the neighboring face's edge. This option is only displayed if at least one selected edge (or an edge from the picked composite curve) is an edge of a stitched face.
|
Optional Step 1 
Set a draft angle. This option is only available for the Tangent > Normal option.
See Options and Results.
Optional Step 2 
Pick edges to replace the extended faces with a patch. This option is only available for the following options:
-
Tangent > Normal option if the Single Face option was not selected in Required Step 1.
-
Tangent > Normal option if the Draft Angle option was not selected in Optional Step 1.
-
Tangent > Continuous
-
Natural - Multi Continuous
This step can be used to create patches on complex areas that may require additional manipulation to achieve the desired result.
See Options and Results.
If this is the final result, press OK ![]() or Apply
or Apply ![]() in the Feature Guide to complete the function.
in the Feature Guide to complete the function.
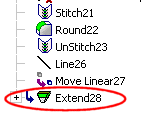
When completed, the Extend feature will appear in the Feature Tree as follows:
|