![]()
Sets: Creating By Criteria 

Access: Open this function from one of the following locations:
The Sets - Create and Edit dialog below lets you define which entities will be included in sets (see Creating (New Set)).
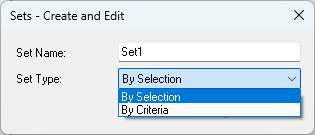
Sets can be created either By Selection or By Criteria.
A set is created in either the Part or Assembly environments. In Assembly, you can create Selection sets that include assembly components or sketches and datums in the assembly (the components can be in sub-assemblies as well). You can also create Criteria sets by using the Sub-Category criterion in assemblies to create sets of catalog components of a certain type.
Alternatively, to group using Folders, see Organizing Sets.
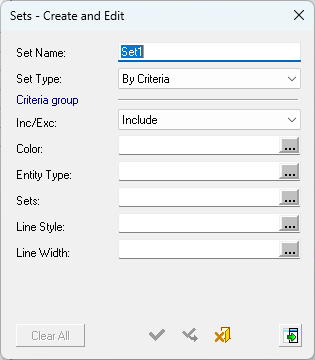
By Criteria
When you choose the By Criteria option, the dialog expands to include several groups of criteria sets.
|
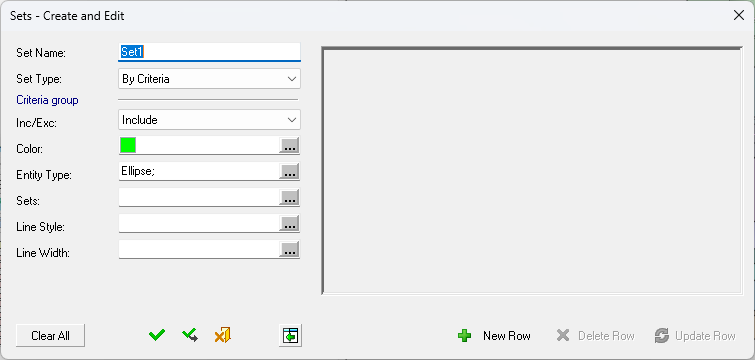
Dialog with no criteria defined |
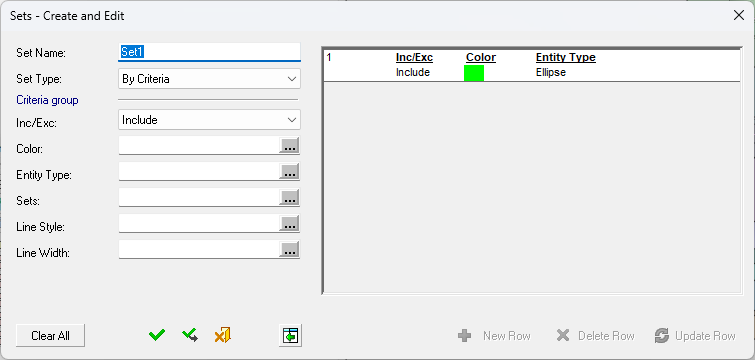
Dialog with criteria defined |
For additional information, see: |
|
|
|
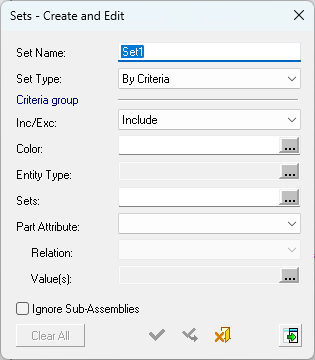
A criteria set allows you to define certain characteristics. Any entity that has the defined characteristics is automatically included in the set.
Naturally these sets are very dynamic. You may think of a criteria set as filters, allowing you to quickly include or exclude certain types of entities in the set. A new file is loaded with a few predefined criteria sets. The simplest way to work with criteria sets is to select the relevant items from the dropdown menus.
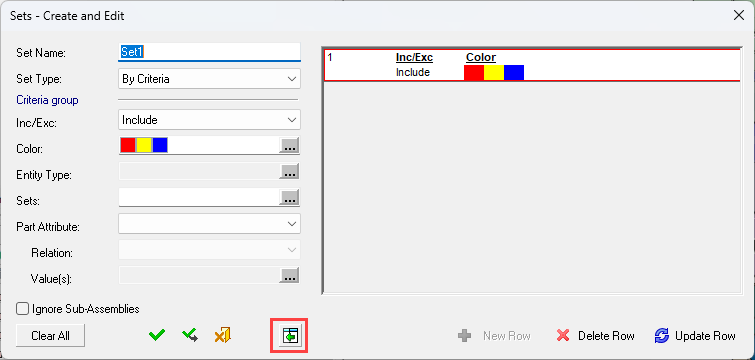
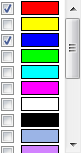
The following example shows the options RED, YELLOW, and BLUE are selected from the Color menu. This set will therefore include all items that are RED, YELLOW, or BLUE. Of course, more combinations are possible. The Sub-Category option is slightly different - it is available only in assemblies and allows you to create sets of catalog objects according to their sub-category. For example, all screws or all guide pins, and so on.
- Make the criteria selection and click the Display all criteria groupsDisplay all criteria groups
 .
. - Click New Row at the bottom of the expanded dialog. A new row is added containing a criteria group.
The Ignore Sub-Assemblies checkbox restricts the selections made to the parts in this layer; sub-assemblies on other layers might also have this attribute, relation, or value, but will not be included in this set.
For more, see:
- Choosing Criteria Types
- Creating Criteria Groups
- Editing Criteria Groups
- Criteria AND / OR Logic
- Single Color Criteria Sets
- Creating Sets Example
Choosing Criteria Types
To choose a criteria type, press the relevant  button and select the criteria. The displayed criteria types are dependent on the current application. The available criteria types are as follows:
|
Inc/Exc |
Include or exclude the criteria below from the set. |
||||||
|
Color |
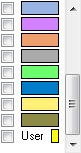
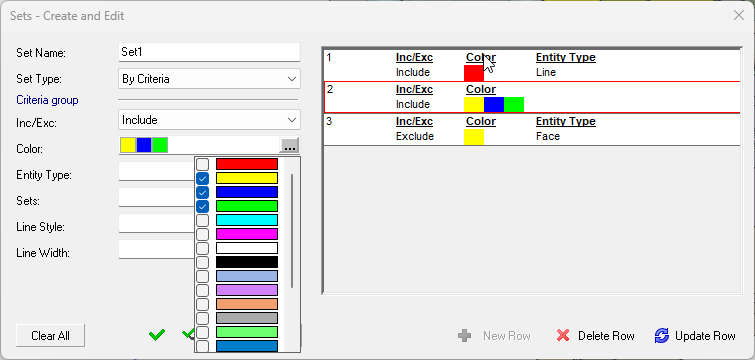
Select the checkbox of the required color(s) from the dropdown list. More than one color may be selected.
Note: The last color of the color selection dropdown list (at the bottom of the list) is called User and displays the existing current color. Clicking this color will display the Expanded Color Picker, enabling you to pick a different color. |
||||||
|
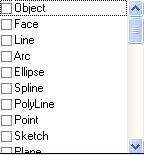
Entity Type |
Select the checkbox of the required entity type(s) from the dropdown list. More than one entity type may be selected.
|
||||||
|
Sets |
Choose one or more existing sets.
Note: In the Sets criteria, if a set is a Single Color Criteria Set, the set color is displayed in the dropdown list adjacent to the set name. |
||||||
|
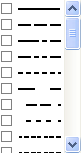
Line Style |
Select the checkbox of the required line style(s) from the dropdown list. More than one style may be selected.
|
||||||
|
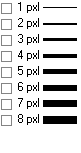
Line Width |
Select the checkbox of the required line width(s) from the dropdown list. More than one thickness may be selected.
|
||||||
|
Part Attribute |
Select the System Attribute from the dropdown list. More than one attribute may be added by creating a new row.
|
||||||
|
Relation |
Defines the relationship between the Part Attribute and the Value (below)―The available relationships are; equals, greater than, less than, contains, any of, not equal, less or equal, greater or equal, does not contain, or none of. |
||||||
|
Value(s) |
The related Value that must be assigned to the Part Attribute for it to be included in the set. By default an exact match will be used, wildcard characters are allowed. For example, if the Part Attribute Description is used with the Relation equals, the Value Ejector Pin will only include items that contain the word 'Ejector Pin', whereas the Value Ejector * will retrun Ejector Plate and Ejector Pin. |
||||||
|
Notes on Part Attribute:
|
|||||||
|
Ignore Sub-Assemblies |
The chosen attribute, relation, or value will only apply to the parts in this layer; sub-assemblies on other layers might also have this attribute, relation, or value but will not be included in this set.
|
||||||
|
Clear All |
Clear all criteria selections. |
||||||


Note: Multiple selections of each criteria can be made.
|
Multiple Color Selection |
Result |
|
|
|
|
|
Creating Criteria Groups
A more advanced usage of criteria sets is with criteria groups. Click the Display all criteria groups buttonDisplay all criteria groups button. to open an advanced section. This is useful when you want to have a more specific set of criteria.
To create Criteria groups defined using OR logic (geometry that fits any given criteria) or AND logic (geometry that fits all given criteria):
-
Define a group of criteria using the dropdown menus as described above in By Criteria. The criteria are displayed on the left.
-
Click New RowNew Row
 . The criteria group is added to the criteria list on the right and the criteria dropdown menus on the left are now cleared so that you can define the next group.
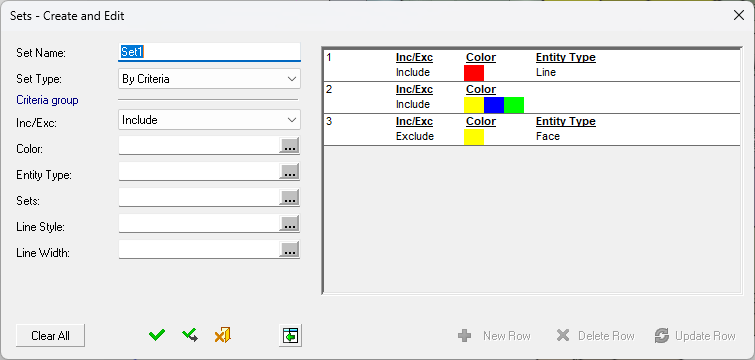
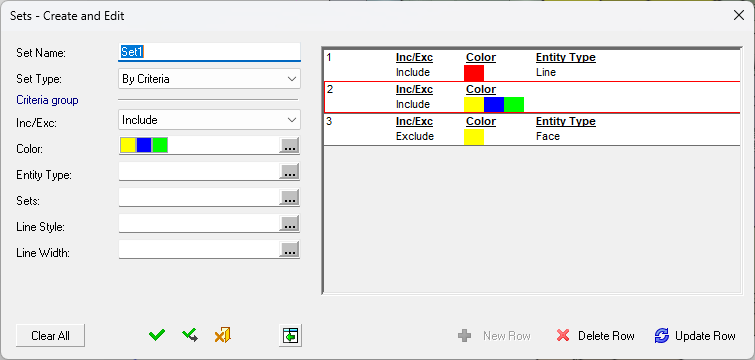
Repeat these steps to create as many criteria groups as required. For example, in the dialog below, the set will include all RED lines and all BLUE, GREEN, or YELLOW entities. It will exclude all YELLOW faces.
Editing Criteria Groups
-
Select the appropriate group from the criteria list on the right. The criteria of the group are immediately displayed in the dropdown menus on the left of the dialog.
Note also that the Delete RowDelete Row and Update RowUpdate Row
 buttons are now available. These are used to delete a selected row or (when you have edited the selection criteria) to update the row.
-
If required, select different criteria and click Update RowUpdate Row
.
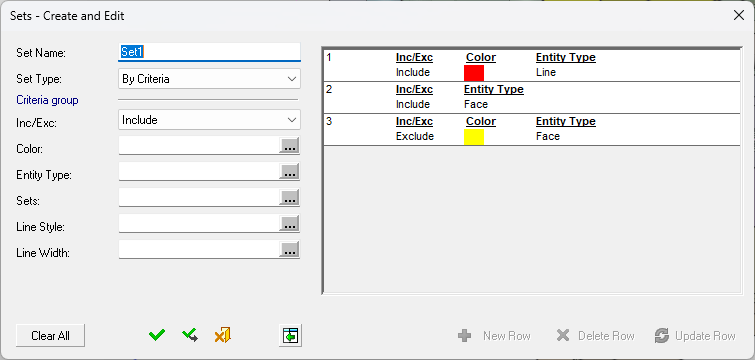
The group list on the right is updated with the new criteria. In this example, the set will now include all RED lines and all faces, except YELLOW faces (the YELLOW faces are excluded).
Click Apply or OK. The geometry fitting the criteria is displayed.
-
From the geometry selection popup submenu, choose Reset Criteria to delete the criteria groups already created.
-
Choose Reset Selection to refresh the geometry selection and to start selecting again.
Note: Criteria selection takes precedence over manual selection. In other words, if you select an entity manually and later create a criteria group that includes that same entity, the entity will be considered a part of the group selected by criteria.
Approval options
|
|
OK - Accept the settings and exit. |
|
|
Apply - Accept the settings and remain in the dialog. |
|
|
Cancel - Reject the settings and exit. |