|
|
Extrude > New/Add: Delta/Reference


Access: Open this function from one of the following locations:
-
Click the
 button in the toolbar.
 -
Select Solid > Main Tools > Extrude from the menu bar.
-
Select Extrude on the popup menu if a sketch or 2D composite curve is selected.
-
Select Die Design > Insert Tools > Extrude from the menu bar.
-
Select Mold Design > Insert > Extrude from the menu bar.
-
Select Insert > Extrude button in the Mold Design Guide Toolbar or Parting Guide Toolbar.
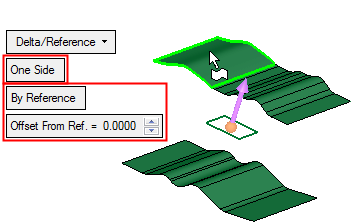
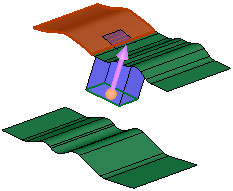
Extrude either by Delta (extrude on one or both sides, by a given value and direction) or by Reference (extrude to a reference face, plane or point).
Note: Picking a reference point creates a plane going through the picked point and normal to the extrude direction.
Important: Objects created by New will be considered independent objects. Those created by Add will be added to the active object.
Notes:
-
If only one object exists in the file it is automatically active, unless manually deactivated or if the active object is deleted. See Activate / Deactivate and Activating Objects.
-
For Add and Remove operations you can use wires or faces from a non-activated component (external reference).
|
Demo: Press the button below to view
a short movie demonstrating the function:
|
Practice: Press the button below to open Cimatron with a practice ELT file similar to that used to create the movie (if the relevant feature already exists in the ELT file, you can either edit it or delete it and create a new feature). |
|
Extrude > New/Add > Delta - Both Sides:
|
|
|
Extrude > New/Add > Delta - One Side:
|
|
|
Extrude > New/Add > To Reference:
|
|


For information regarding the steps in this function and for parameter explanations, see Extrude: Options and Results.
Required Step 1 
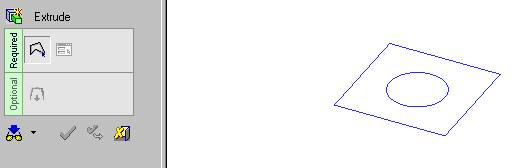
Selected entity.
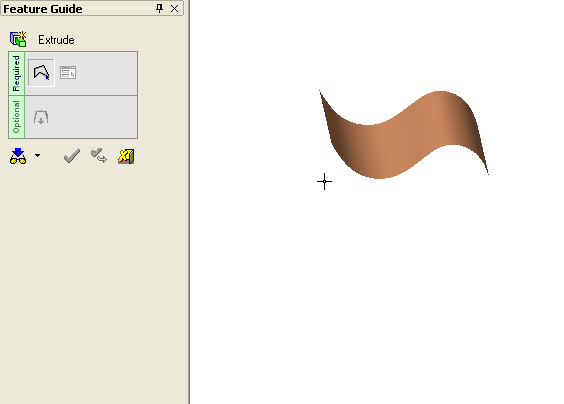
Required Step 2 
Set the extrusion parameters and the direction. The following parameters are displayed:

The default direction is normal to the 2D contour or sketch plane. You can flip the direction by clicking the displayed arrow head or body, or you can click on the arrow origin to set another direction.
|
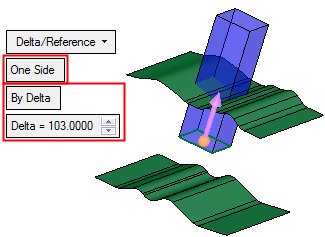
By Delta |
This is a toggle option By Delta / By Reference. This option is displayed if the Delta/Reference option is selected above.
|
Additional Delta/Reference Notes
- Additional Delta/Reference NotesAdditional Delta/Reference Notes
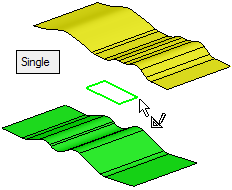
When the Both Sides option is used, one side can be extruded By Reference and the other side By Delta, as shown below:
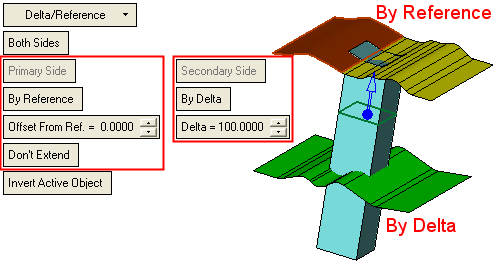
The parameter settings for each extrude side are displayed under their respective Primary Side and Secondary Side headings.
In this case, it is clear where the Primary and Secondary sides are (one extruded By Reference and the other By Delta). When both the sides are extruded By Reference, the Primary and Secondary sides are marked by labels.
Extrude Both Sides - both By Reference.Extrude Both Sides - both By Reference.
When the Both Sides option is used, and both the sides are extruded By Reference, the Primary and Secondary sides are labeled as they are picked, as shown below.
In the example below, when the first reference entity (datum plane, face or object) is picked, it is labeled (see the labeling rules below).
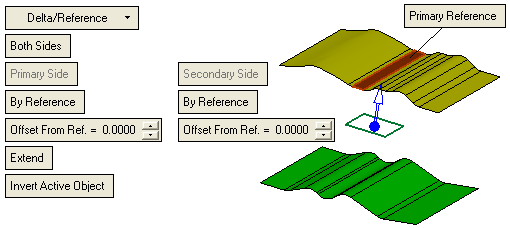
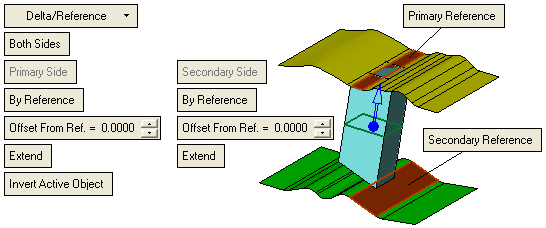
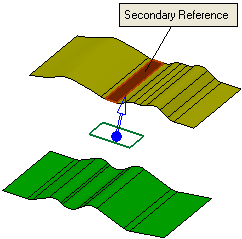
When the second reference entity (a different reference) is picked, it is also labeled. If the first reference was labeled as Primary Reference, then the second is labeled as Secondary Reference, and vice versa (again, see the labeling rules below). When the second reference is picked, the extruded object is previewed.
- Labeling RulesLabeling Rules
Primary or Secondary Reference label.Primary or Secondary Reference label.
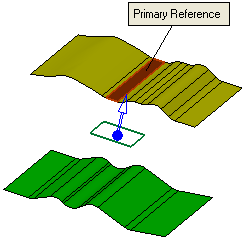
When the first reference entity (datum plane, face or object) is picked, it is labeled as either the Primary Reference or Secondary Reference.
The picked point on the reference determines the anchor location of the label and also the contents of the label. If the picked point is in the direction of the directional arrow, then the label is Primary Reference, if it is on the other side, the label is Secondary Reference.
In the example below, the first reference is labeled as Primary Reference because the picked point is in the direction of the directional arrow.
Re-picking a reference entity.Re-picking a reference entity.
Re-picking a reference entity, has the effect of unselecting it, and the label is removed.
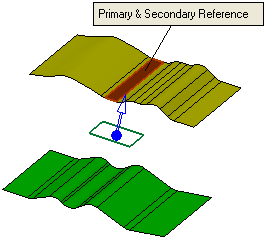
Re-picking a label - When both labels displayed:Re-picking a label - When both labels displayed:
If both the labels are displayed and you pick one of the labels, the labels are switched, as shown below:
Both labels displayed
Picking one switches the labels

Re-picking a label - When one label is displayed:Re-picking a label - When one label is displayed:
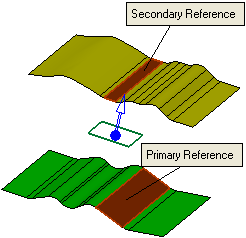
If one label is displayed; the 1st pick switches the labels (Primary changes to Secondary and vice versa); the 2nd pick changes the label to Primary & Secondary Reference, as shown below:
One label displayed:
1st pick:
2nd pick:
See also Primary & Secondary Reference used together with As Plane / As Object option.
- Planar / Non-Planar Reference Face OptionsPlanar / Non-Planar Reference Face Options
When selecting reference geometry, the following toggle options enable you to define how the face boundary is to be extended.
Extend
If the reference entity is a planar or non-planar face, in both cases the toggle option Extend / Don't Extend is displayed.
Default: Extend.For planar faces: When picking a 2D reference curve, edge or sketch, a plane is displayed though the reference geometry and the Extend option is displayed grayed out.
Example:Example:
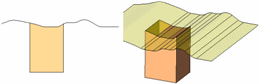
For non-planar faces: If the Extend option is selected, an additional toggle option Natural / Tangent is displayed.
Default: Natural.Natural
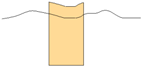
The edge of the extruded face is produced as a natural extension of the reference face.
Tangent
The edge of the extruded face is produced in the direction tangent to the reference face.
Planar / Non-Planar Reference Face Examples
In the examples below, the Primary Reference face is non-planar and the Secondary Reference face is planar. As mentioned above, the planar or non-planar attributes of the reference face determines the options that are displayed.

Primary Side options:
Extend > NaturalSecondary Side option:
Extend
Primary Side options:
Extend > TangentSecondary Side option:
Don't Extend
Primary Side options:
Don't ExtendSecondary Side option:
Don't ExtendPrimary & Secondary Reference and As Plane / As Object option
If the picked reference is a planar face and the label is set to Primary & Secondary Reference (see the labeling rules), it is possible to set one option to Extend and the other to Don't Extend.
In the example below, the blue reference face is planar:
In this case, if the Primary Reference is set to Don't Extend and the Secondary Reference is set to Extend, the result would be as follows:

|