|
|
Auto Reference 


Access: Invoke the Sketcher, define the sketch plane and then invoke this function from one of the following locations:
-
To enable references to be automatically displayed, click the Sketcher Tools > Allow Auto Reference button
 in the Sketcher toolbar.
 -
To show the added automatic references, click the Sketcher Tools > Show Auto Reference button
 in the Sketcher toolbar.
The Auto Reference tool enables external references (outside of the sketch) to be available in the Sketcher without first adding them as references. These external references allow you to constrain or dimension to geometry outside of the sketch.
- Allow Auto Reference: Enable automatic references to be used.
- Show Auto Reference: Show all added (used) automatic references.
Allow Auto Reference
Allow the Sketcher to take automatic references (taken for visible entities without adding them as references).
Automatically display references
-
InvokeInvoke the Allow Auto Reference
 Sketcher tool.
 -
While using a sketch creation or editing tool (see the note below), whenever a curve is highlighted, the appropriate reference points are highlighted.
-
When a curve that is not an arc or circle is highlighted, its mid and end points are highlighted.
-
When a circle is highlighted, its center point is highlighted.
-
When an arc is highlighted, its center, mid and end points are highlighted.
-
-
Click on curve and the highlighted reference point is automatically selected for the current sketch creation.
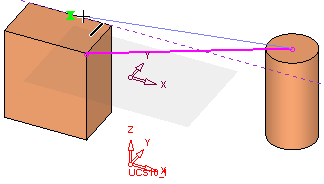
For the curve below, the closest reference point is automatically highlighted.
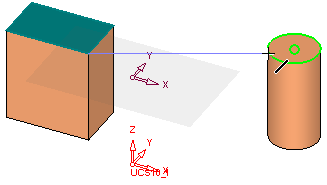
For the circle, the center point is automatically highlighted.


For the curve below, the closest reference point is automatically highlighted.
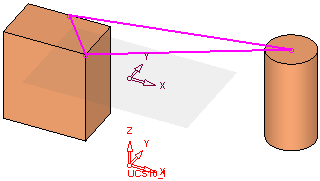
The automatic reference points are used in the sketch creation.


Notes:
-
The following sketch creation tools can use the Auto Reference tool; Arc, Circle, Ellipse, Line, Point, Rectangle, Spline, Symmetry Line. In addition, the following tools can also use automatic references, Dimensions, Constraints and the right-click popup options Parallel, Normal and Tangent.
-
The following sketch editing tools can use the Auto Reference tool; Copy/Move, Corner, Dynamic Trim, Mirror, Offset, Trim/Extend.
-
When editing the sketch plane or orientation, the automatic references keep their connection to the original geometry if the new plane is parallel to the old one. Otherwise, the connection is broken. If the reference keeps its connection to the geometry, it remains hidden; if it loses the connection, it becomes visible.
Show Auto Reference
Show automatic references (taken for visible entities without adding them as references).
Show the added (used) automatic references
-
InvokeInvoke the Show Auto Reference
 Sketcher tool.
 -
Select the Show Auto Reference
 button to show the added (used) automatic references. Click again to hide.
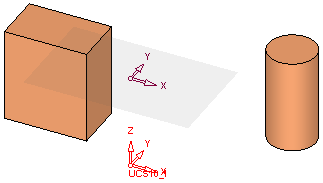
The used auto reference points are not displayed.
The used auto reference points are displayed when the Show Auto Reference tool is selected.


|
