|
|
Attach Name to Entity  : Options and Results
![]()
![]()
Access: Open this function from the following location:
-
Select Catalog > Catalog Part Definitions > Attach Name to Entity from the Part menu bar.
Attach a name to an entity to be used in catalog or assembly Add rules.
These entities could be cutting objects, faces, axes, etc.
Required Step 1 
Set the parameter and pick an entity to which you wish to add properties.
The Attach / Detach toggle option is displayed; toggle to the appropriate option:
|
Attach |
Attach properties to an entity. |
|
Detach |
Detach properties that were previously attached to the entity. |
|
Auto Attach |
Automatically attach names to all relevant plate entities (faces, UCSs and circular edges) at once.
Names are automatically attached to all coordinate systems associated with the picked object (i.e., object entities that were used for feature definition, such as UCSs defined using object points, etc.). No name is attached to the main UCS. Names that were attached previously are not overwritten. |
|
Auto Detach All |
Automatically detach names from all relevant plate entities (faces, UCSs, and circular edges) at once, irrespective of whether they were added manually or automatically. Pick the appropriate plate object and confirm the warning message. All names are detached. |
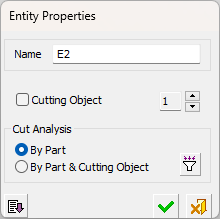
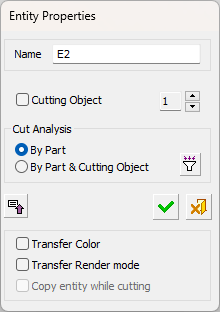
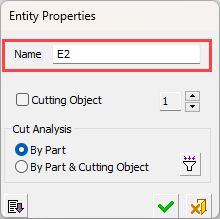
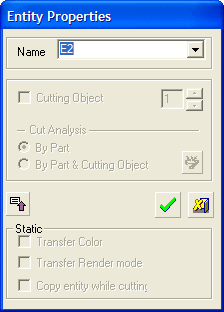
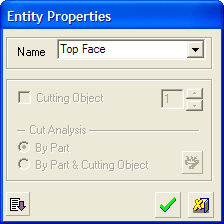
When you pick an entity, the Entity Properties dialog is displayed. Depending on which entity is picked, some of the fields in the dialog may be grayed out. The following dialog is displayed:
|
The default (collapsed) dialog: |
The expanded dialog: |
|
|
|
Examples
The following entities can be picked:
- Objects
- Faces
- Edges, Wire Bodies and Points
- Datums
For each of these entities:
-
Pick the required entity.
-
Set the parameters in the Entity Properties dialog.
-
Click OKOK
 to attach the properties to the entity.
 -
Click CloseClose
 on the Feature Guide to exit the function.
For each of these entity types, an Attach example is shown below. A Detach example if also explained.
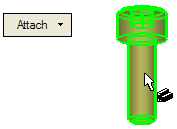
Attach an Object
-
Toggle the Attach/Detach button to display Attach, and pick the object to which you wish to attach properties.
-
The Entity Properties dialog is displayed.
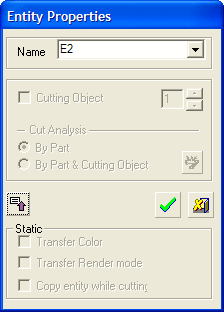
Enter a name for the object.
-
Set the parameters.
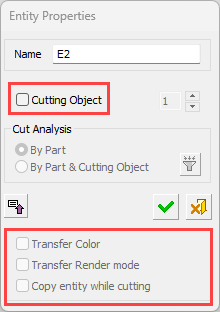
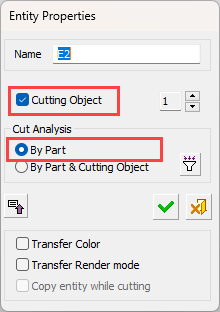
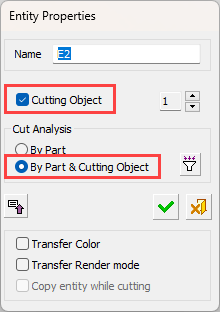
Decide whether the object is a cutting object. If Cutting Object is not selected, the remaining fields of the dialog (including the expanded section) are all grayed out.
|
|
|
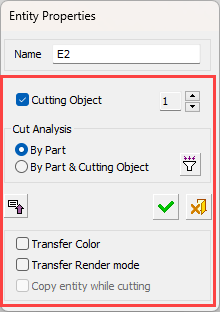
If Cutting Object is selected:
-
Define how the Cut Analysis is to be performed (By Part or By Part & Cutting Object).
-
If there are several parting objects, use the arrows (next to the number) to change the cutting object number.
-
Click the Expand buttonExpand button
 to display the Static section which enables you to attach/detach Transfer Color and Transfer Render Mode attributes to all object faces at once.
 -
If you select the Transfer Color and Transfer Render checkboxes, the color (colors, hole attributes, threads) and render attributes of the part are transferred to the "active" part during add, cut and divide operations. Transferring colors may be required for color coding of holes, for example.
Note: Transfer Color default setting. When creating a cutting object by using the Cutting Object function, the default setting for the Transfer Color checkbox (in the Attach Name to Entity function) is defined in the Preferences.
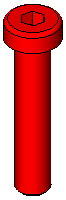
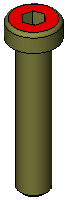
Cut all the parts in the active assembly which collide with the catalog part (in this case a screw).
|
|
|
Cut all the parts in the active assembly which collide with the catalog part and the cutting object.
|
|
|
-
To define parts that may be cut, click the Part Attribute Filter buttonPart Attribute Filter button
 . This displays the Selection Filter dialog.
|
|
Select the attributes that should belong to parts that may be cut candidates. In the example dialog displayed here, parts with a Cooling Items category will never be cut, even if geometrical analysis includes it in the cutting list. The list of categories and sub-categories in the dialog is derived from the AttrnTrnMap.XML file. Either select the required checkboxes individually, or use the appropriate buttons to select or clear all the checkboxes. See Selection Filter for additional information on this dialog. |
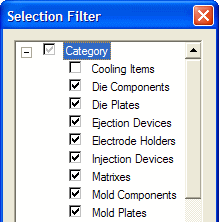
Note: When a Sub-Category / Category is missing from the attributes list or when defining an attribute that does not exist in the Selection Filter, the entire list in the Filter is regarded as 'checked ON' (which means that the part will be cut).
-
Click OKOK
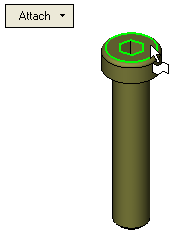
to attach the properties to the object. The attached object is displayed in red, indicating that properties have been attached to it.
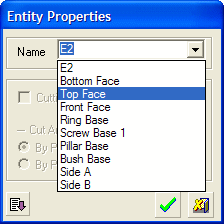
Attach a Face
-
Toggle the Attach/Detach button to display Attach, and pick the face to which you wish to attach properties.
-
The Entity Properties dialog is displayed.
|
Select the name from a drop-down list or type in a different name. |
All other fields in the dialog are grayed-out when a face is picked. |
|
|
|
-
Click OKOK
to attach the name to the face.
The attached entity is displayed in red, indicating that properties have been attached to it.
Attach an Edge, Wire Body or Point
-
Toggle the Attach/Detach button to display Attach, and pick the entity (in this case a point) to which you wish to attach properties.
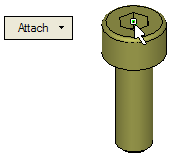
-
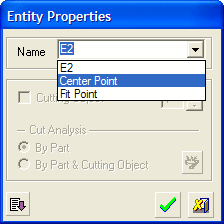
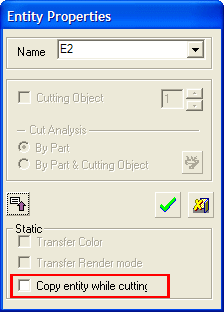
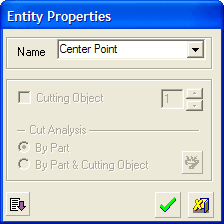
The Entity Properties dialog is displayed.
|
Select the name from a drop-down list or type in a different name. Points and wire bodies have different drop-down lists. |
Click the Expand button |
|
|
|
|
The Copy entity while cutting attribute can be attached to wire entities in catalog parts. The wire entities will then be copied to components that get cut by the catalog holding them. The Copy entity while cutting parameter is grayed out if edges are picked or if there is no cutting object defined for the catalog part. |
-
Click OKOK
to attach the name to the point.
The attached entity is displayed in red, indicating that properties have been attached to it.
Attach a Datum
-
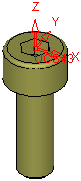
Toggle the Attach/Detach button to display Attach, and pick the datum (in this case a UCS) to which you wish to attach properties.
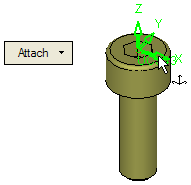
-
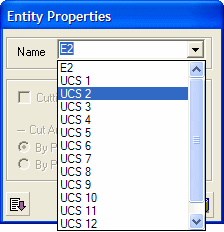
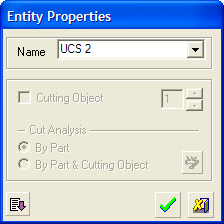
The Entity Properties dialog is displayed.
|
Select the name from a drop-down list or type in a different name. |
All other fields in the dialog are grayed-out when a face is picked. |
|
|
|
-
Click OKOK
to attach the name to the datum.
The attached entity is displayed in red, indicating that properties have been attached to it.
Detach a Face
-
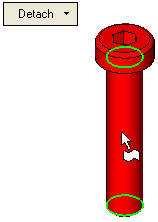
Toggle the Attach/Detach button to display Detach, pick the entity whose properties you wish to detach and exit.
-
A confirmation dialog with an appropriate message is displayed. Confirm that you want to detach the entity.
-
The entity is detached and changes color, indicating that properties have been detached from it.

|