|
|
Table of Holes: Content Changes

Access: Open this function from one of the following locations:
-
Click the
 button in the toolbar.
 -
Select Symbols > Tables > Table of Holes from the menu bar.
Edit the content of a Table of Holes (ToH) by using the Table of Holes Editor. The Table of Holes Editor is used to do all the content editing in the TOH.
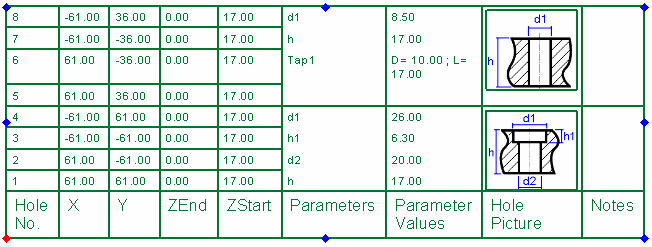
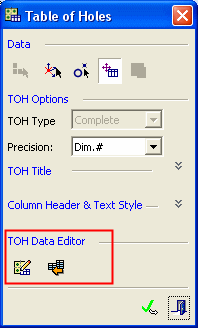
Table of Holes Data Editor
After a Table of Holes has been created, the Table of Holes dialog can be used to access the Tables of Holes Editor and/or to split the table, using the highlighted options:
|
|
The following content changes can be performed from the Table of Holes Editor:
Splitting Tables |
 and
and  buttons, see the similar process for
 Display the Table of Holes Editor dialog
-
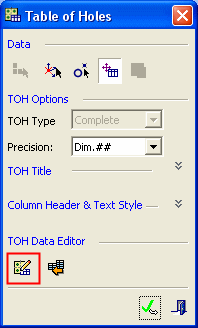
Double-click the TOH to display the Table of Holes dialog.
-
Press the Edit Table of Holes
 button (highlighted below).
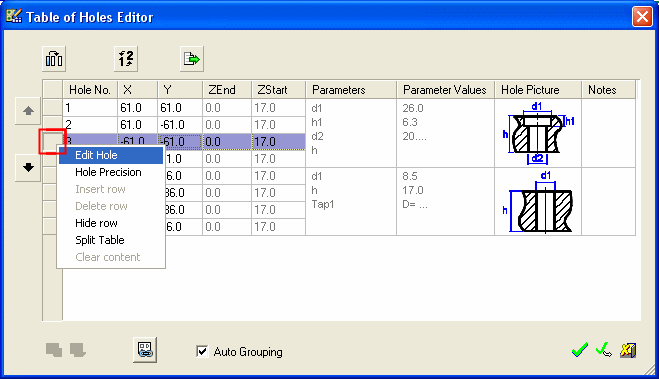
The Table of Holes Editor dialog is displayed:
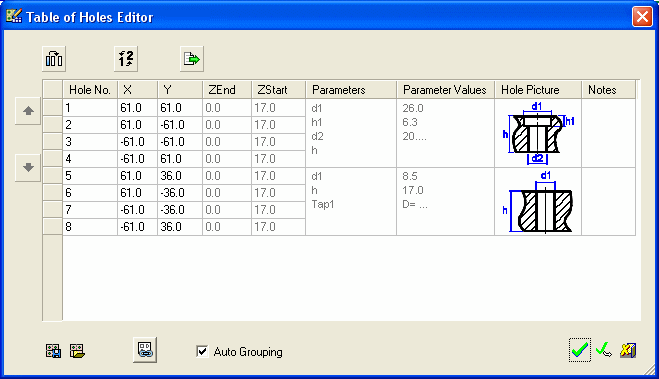
The editing options of this dialog are accessible via the buttons and popup menus. These options enable you, among other possibilities, to:
- Perform the required changes to the table and then click OK
 or Apply
  in the Table of Holes Editor dialog. The changes are immediately implemented in the Table of Holes.
Table of Holes Editor Buttons
The Table of Holes Editor dialog contains the following buttons:
|
|
Displays the Column Chooser dialog, enabling you to add or remove fields in the table and sort them as required. In addition you can define selected field properties.
The User Type field enables you to define the hole types (A, B, etc) and is editable for all holes (sketch and true holes). The User Type definition defined in the Table of Holes Editor can also be displayed in the Label of Holes, if required. |
|
|
Renumber the holes in the table. |
|
|
Move an entire group of holes up or down the table. |
|
|
Displays the Save the TOH file dialog enabling you to export the file to the *. CSV format for backup and retrieval purposes. |
|
|
Displays the Save Table of Holes (TOH) Template dialog, enabling you to save a template for the TOH based on a template file (.ttp). This file can then be retrieved (Set TOH Template), and used as a template for other TOHs. The Save as TOH TemplateSave as TOH Template Template dialog is displayed.
The .ttp file is saved in the folder \Cimatron\Data\Templates\.
|
|
|
Displays the Set Table of Holes (TOH) Template dialog, enabling you to define a template for the TOH based on the template *.ttp file. Retrieve a previously defined TOH template (Save as TOH Template), and use it for other TOHs. The Set TOH TemplateSet TOH Template dialog is displayed.
Select the template from the folder \Cimatron\Data\Templates\.
|
|
|
Displays a confirmation message to confirm whether you want to overwrite local changes in the TOH relating to the sheet. Click Yes to confirm you changes. Note: This button becomes enabled when you perform a manual change and then click |
|
Auto Grouping |
The Auto Grouping option applies the grouping automatically and immediately after any change. If you unselect this option, the changes will only be implemented after clicking OK |
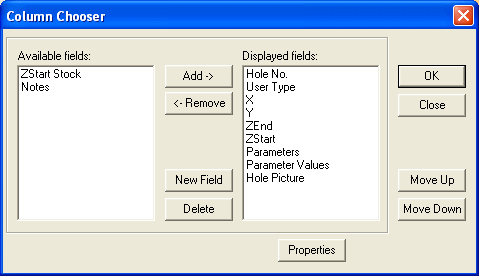


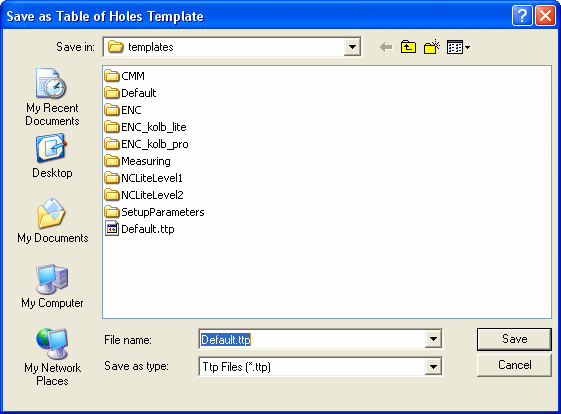

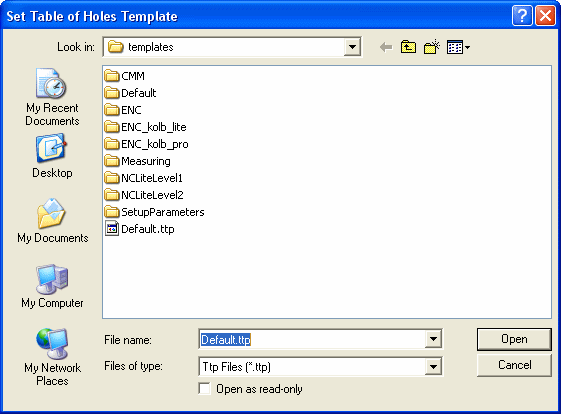

Table of Holes Editor Popup Menus
The Table of Holes Editor dialog contains the following right-click menus:
Table Function
To modify the rows in the TOH, right-click the grey squareright-click the grey square to the left of the specific row. The row is shaded and a popup menu with row editing options is displayed. Depending on the row that was selected, one of the following popups are displayed:
|
Displayed when an undefined hole is selected. |
Displayed when an existing defined hole is selected. |
Displayed when an undefined Sketch hole is selected. |
Displayed when an existing defined Sketch hole is selected. |
|
|
|
|
|
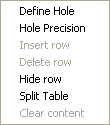

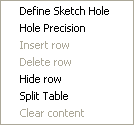
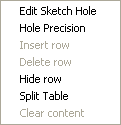
The Table Function popup menu contains the following options:
|
Define Hole |
Displays the Define New Hole dialog, enabling you to define a new type of hole in the system. This option is available if an undefined hole(s) is displayed in the TOH. For more, see Defining "Undefined" Holes. |
|
Edit Hole |
Displays the Edit Existing Hole dialog, enabling you to edit an existing hole. For more, see Editing Holes. |
|
Define Sketch Hole |
Displays the Define New Hole dialog, enabling you to define a new Sketch hole in the system. For more, see Defining Sketch Holes. |
|
Edit Sketch Hole |
Displays the Edit Manual Hole dialog, enabling you to edit an existing Sketch hole. For more, see Editing Sketch Holes. |
|
Hole Precision |
Displays the Hole Precision dialog, enabling you to define a different precision for each hole (or group of holes). For more, see Hole Precision. |
|
Insert row |
Insert a new row at the bottom of the TOH. |
|
Delete row |
Removes a row from the TOH. |
|
Hide row |
Hides the selected row. This option is used if you don't want the data to be displayed. |
|
Split table |
Splits the table at the selected row. |
|
Clear content |
Removes the data from the selected row. |
Text Editing
To edit text and position it within individual cells, right-click within the cellright-click within the cell to display a popup menu and select the required option. The popup menu is displayed as follows:
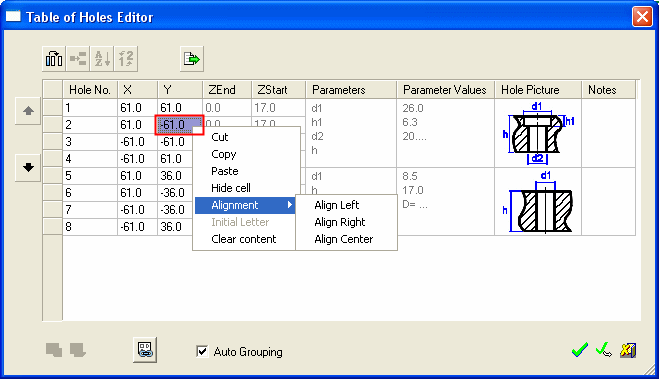
The Text Editing popup menu contains the following options:
|
Cut |
Remove data from selected cell. |
||||||||||
|
Copy |
Copy data from the selected cells. |
||||||||||
|
Paste |
Paste data into the selected cell. |
||||||||||
|
Hide cell |
Hide data of the selected cell. This data will not be displayed in the TOH. |
||||||||||
|
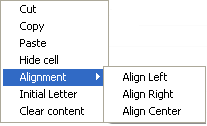
Alignment |
Define the text alignment of the selected cell, as follows:
|
||||||||||
|
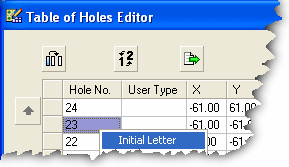
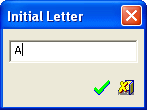
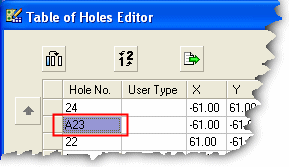
Initial Letter |
Manually add or edit initial letters (prefix) to hole names. When this option is selected, the Initial Letter dialog is displayed, enabling you to add or edit the initial letters.
Notes:
|
||||||||||
|
Clear Content |
Removes the content from the selected cell. |
|