|
|
Parting Analytic Tools  : Options and Results

Access: Open this function from one of the following locations:
-
Select Parting Analysis Tools > Parting Analytic Tools from the Parting Guide Toolbar.
-
Select Parting Analysis Tools > Parting Analytic Tools from the Mold Design Guide Toolbar.
Analyze the quality of the parting (QuickSplit) work and parting surfaces creation.
See Geometry Inspection Tools for additional information.
Once the analysis is completed, the operations to be performed to fix any problematic areas, depends on results of the analysis. See the example operation below.
Required Step 1 
The operation to be performed in this step depends on the dropdown option selected. The following options are displayed:
The screen parameters that are displayed, depend on the option selected. To perform the open edge analysis, pick the required entities according to the option selected:
|
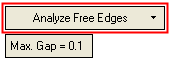
Analyze Free Edges: |
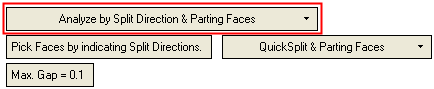
Analyze by Split Direction & Parting Faces: |
|
|
|
|
|
|
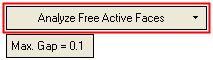
Analyze Free Active Faces: |
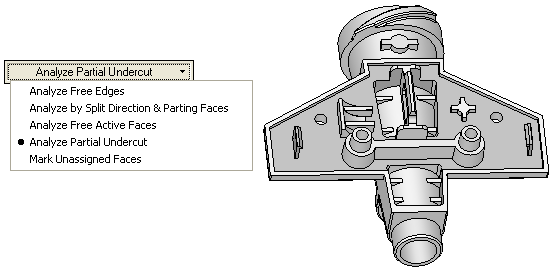
Analyze Partial Undercut: |
Mark Unassigned Faces: |
|
|
|
|


|
Analyze Free Edges |
This analysis detects and marks edges (or segments of edges) that do not "touch" other edges. This is useful for detecting parting surfaces that do not match neighboring active faces. |
||||||||||||||
|
Analyze by Split Direction & Parting Faces |
This analysis checks the integrity of the "sheet" of faces created by the active and parting faces of the split direction, and makes sure it is ready to be used to cut the active part (core, cavity, slider, etc.). The following toggle parameter is displayed Pick Faces by indicating Split Directions/Free Selection which gives you a choice of how to pick the faces.
|
||||||||||||||
|
Analyze Free Active Faces |
This analysis is useful for detecting missing internal parting surfaces by looking for active faces that do not have a neighboring parting surface. Select an opening direction by picking a face. The result of this option is the same as the preview that is displayed when running the Draft Angle Analysis function on the parting surface part. |
||||||||||||||
|
Analyze Partial Undercut |
Display partial undercut problems. This analysis is the same as the QuickSplit analysis that shows faces that form a partial undercut. |
||||||||||||||
|
Mark Unassigned Faces |
This analysis marks unassigned faces in a model to ensure that the QuickSplit is correct. This option places a green dot on any face in the work part that has yet to be assigned a pull direction. This is especially useful for locating small faces in complex designs that may have been overlooked. This same analysis can also be run from the Parting Tree. Right-click over the unassigned set in the tree and select Mark Faces. |
||||||||||||||
|
Max. Gap |
This parameter controls the tolerance of the stitch and is used by the Analyze Free Edges, Analyze by Split Direction & Parting Faces and Analyze Free Active Faces options. The Max. Gap value remains the same for all these toggle options. The initial default tolerance value is as defined in the Preferences. See the same Preference also for the tolerance range. Changes to the tolerance will not be reflected on the screen until the Preview button is pushed. |
Once the analysis is completed, the operations to be performed to fix any problematic areas, depends on results of the analysis. See the example operation below.
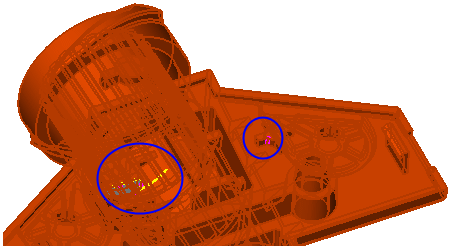
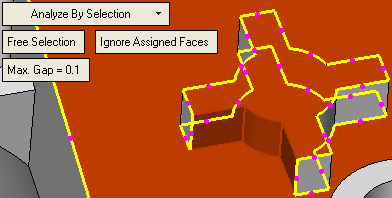
In this example, the two areas marked in the blue circles were detected as problematic areas. The open edges are colored in yellow.
Press OK ![]() or Apply
or Apply ![]() in the Feature Guide to complete the function.
in the Feature Guide to complete the function.
When exiting the function, the detected open edges are marked as follows (if required, you can Hide/Show Open Edge Analysis):
Fix the problematic areas (see the example operation below) and re-invokere-invoke the Parting Analytic Tools function. If there are no open edges, an appropriate message is displayed.
Example Operation
Once the analysis is completed, the operations to be performed to fix any problematic areas, depends on results of the analysis.
In this example, the two areas marked in the blue circles were detected as problematic areas. The open edges are colored in yellow.
When exiting the function, the detected open edges are marked as follows (if required, you can Hide/Show Open Edge Analysis):
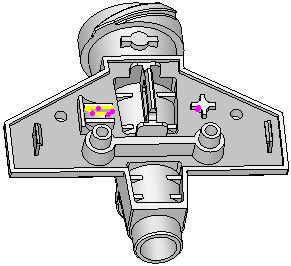
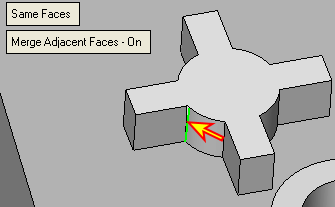
In this example, zooming into one of the problematic areas reveals the following:
|
|
|
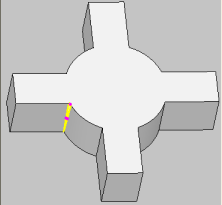
In this example, the problem can be fixed by activating the work part, invoking the Close Open Gaps function and selecting the edge as indicated in the images below:
|
|
|
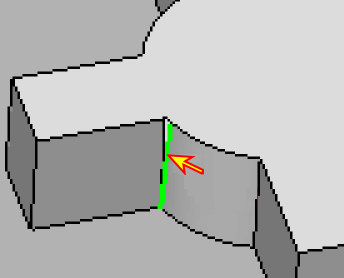
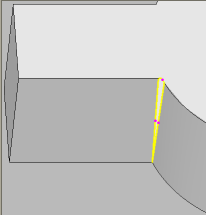
When you exit the Close Open Gaps function by pressing OK, the gap is closed; as shown below.
To verify this, re-invoke the Parting Analytic Tools function and analyze the relevant area.
The gap is closed. When all gaps have been closed the function displays an appropriate message.
|